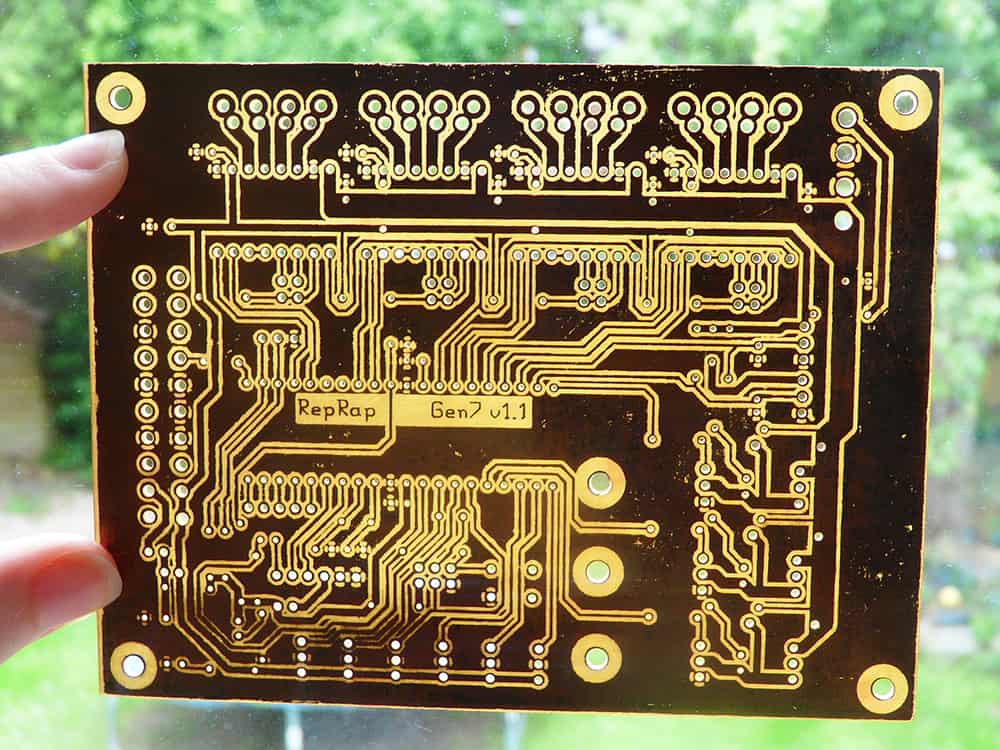
Screen printing is a manufacturing technique that has been used for decades in various industries, including electronics. In the printed circuit board (PCB) industry, screen printing is a crucial step in the production process that involves applying conductive ink onto the board’s surface. This process creates the circuitry that connects the different components of the PCB.
The screen printing process for PCBs involves using a stencil to deposit the conductive ink onto the board’s surface. The stencil is made from a thin, flat sheet of material, such as polyester or stainless steel, that has a pattern of openings cut into it. The ink is then forced through the stencil using a squeegee, which spreads the ink evenly over the board’s surface. The ink is then cured using heat, which solidifies it and creates a durable, long-lasting circuit. Screen printing is a cost-effective and reliable method for producing high-quality PCBs, and it is widely used by manufacturers around the world.
The Basics of Screen Printing for PCB
What is Screen Printing?
Screen printing is a popular printing technique used in the electronics industry to create printed circuit boards (PCBs). It involves the transfer of ink or other materials through a mesh screen onto the surface of a substrate, such as a PCB. The mesh screen acts as a stencil, allowing the ink to pass through only in the desired areas.
Why Use Screen Printing for PCB?
Screen printing is a cost-effective and efficient method for producing high-quality PCBs. It can be used to print a variety of materials, including conductive inks, solder masks, and legends. Screen printing also allows for precise control over the thickness and placement of materials, making it ideal for producing complex PCB designs.
Screen Printing Process for PCB
The screen printing process for PCBs typically involves the following steps:
- Design: The PCB design is created using computer-aided design (CAD) software.
- Film Production: A film is produced from the PCB design, which is used to create the stencil for the screen printing process.
- Screen Preparation: The mesh screen is prepared by coating it with a light-sensitive emulsion, which is then exposed to UV light through the film to create the stencil.
- Printing: The ink or other material is applied to the screen, which is then pressed onto the surface of the PCB. The ink passes through the stencil and onto the surface of the PCB, creating the desired pattern.
- Curing: The ink is cured using heat or UV light to ensure that it adheres to the surface of the PCB and dries completely.
Overall, screen printing is a versatile and reliable method for producing high-quality PCBs. It offers precise control over materials and placement, making it ideal for complex designs.
Screen Printing Equipment for PCB
When it comes to screen printing for PCB, there are a few essential pieces of equipment that are needed for a successful print. These include a screen printing machine, stencil, squeegee, and ink.
Screen Printing Machine
The screen printing machine is the backbone of the screen printing process. It is used to hold the stencil in place while the ink is applied to the PCB. There are a variety of different types of screen printing machines available, ranging from manual to automatic. The type of machine you choose will depend on your budget, the size of your production run, and your specific needs.
Stencil
The stencil is used to create the design that will be printed onto the PCB. It is typically made from a thin sheet of metal or plastic that is coated with a light-sensitive emulsion. The emulsion is then exposed to UV light through a film positive, which hardens the emulsion in the areas where the design is located. The unhardened emulsion is then washed away, leaving behind the stencil.
Squeegee
The squeegee is used to apply the ink to the PCB through the stencil. It is typically made from a rubber blade that is attached to a handle. The squeegee is pulled across the stencil, forcing the ink through the open areas and onto the PCB. The type of squeegee you choose will depend on the type of ink you are using and the size of your production run.
Ink
The ink used for screen printing on PCBs is typically a specialized type of ink that is designed to adhere to the surface of the PCB and withstand the harsh conditions of the manufacturing process. There are a variety of different types of ink available, including epoxy, acrylic, and polyurethane. The type of ink you choose will depend on the specific requirements of your project.
Overall, the success of your screen printing project will depend on the quality of the equipment you use. By investing in high-quality equipment, you can ensure that your prints are accurate, consistent, and durable.
Preparing for Screen Printing
Designing the PCB Layout
Before starting the screen printing process, it is essential to design the layout of the PCB. The layout should be designed using a software tool, such as Eagle or Altium. The design should be precise and accurate, with all the necessary components placed correctly.

Creating the Stencil
Once the layout is finalized, the next step is to create the stencil. The stencil is used to transfer the ink onto the PCB. The stencil can be created using various materials, such as Mylar or polyester film. The stencil should be cut precisely to match the layout of the PCB.
Preparing the Screen
After the stencil is ready, the next step is to prepare the screen. The screen is used to transfer the ink from the stencil onto the PCB. The screen should be cleaned thoroughly to remove any dust or debris. The screen should be coated with emulsion, which will harden when exposed to light.
Preparing the Ink
The final step is to prepare the ink for screen printing. The ink should be mixed thoroughly to ensure consistency. The ink should be of high quality and should match the color of the PCB. The ink should be poured onto the screen and spread evenly using a squeegee.
In conclusion, preparing for screen printing is a crucial step in the PCB manufacturing process. By following the steps outlined above, you can ensure that the screen printing process is smooth and efficient.
Screen Printing Techniques for PCB
Single Layer Screen Printing
Single layer screen printing is a popular technique for producing PCBs with a single layer of conductive material. This technique involves printing the conductive ink onto a substrate using a stencil. The stencil is placed on top of the substrate, and the ink is forced through the openings in the stencil using a squeegee. Once the ink has been applied, the stencil is removed, and the ink is cured using heat.
Multi-Layer Screen Printing
Multi-layer screen printing is a technique for producing PCBs with multiple layers of conductive material. This technique involves printing each layer of conductive ink onto a substrate using a stencil. The stencils are aligned and stacked on top of each other, and the ink is forced through the openings in each stencil using a squeegee. Once all of the layers have been printed, the stencils are removed, and the ink is cured using heat.
Fine Line Screen Printing
Fine line screen printing is a technique for producing PCBs with very thin lines of conductive material. This technique involves using a stencil with very small openings to print the conductive ink onto a substrate. The ink is forced through the openings in the stencil using a squeegee, and the stencil is removed once the ink has been applied. The ink is then cured using heat.
Overall, screen printing is a versatile and cost-effective technique for producing PCBs. It allows for precise and repeatable printing of conductive material onto a substrate, and can be used to produce PCBs with a variety of different features and properties. However, it is important to use high-quality materials and equipment, and to follow proper safety procedures when working with conductive inks and other chemicals.
Advantages and Disadvantages of Screen Printing for PCB
Advantages
Screen printing is a widely used technique for printing on PCBs. This technique offers several advantages, including:
-
High accuracy: Screen printing offers high accuracy, which is important when printing on small PCBs with complex designs. This technique can produce fine features with high precision.
-
High throughput: Screen printing is a fast and efficient process, making it ideal for high-volume production. This technique can print multiple PCBs simultaneously, which can save time and reduce costs.
-
Versatility: Screen printing can be used to print a wide range of materials, including conductive inks, solder paste, and insulating materials. This technique can print on various substrates, including rigid and flexible PCBs.
-
Cost-effective: Screen printing is a cost-effective technique, especially for high-volume production. This technique requires minimal setup time and can be automated, reducing labor costs.

Disadvantages
Despite its advantages, screen printing also has some drawbacks, including:
-
Limited resolution: Screen printing has a limited resolution compared to other printing techniques, such as photolithography. This technique cannot produce features smaller than the mesh size of the screen.
-
Limited thickness: Screen printing is limited in the thickness of the material that can be printed. This technique cannot print materials thicker than the mesh size of the screen.
-
Limited design flexibility: Screen printing is not suitable for printing complex designs with fine features. This technique is best suited for printing simple designs with large features.
-
Limited material compatibility: Screen printing is not compatible with all materials. This technique may not work with materials that are too viscous or too thin.
In conclusion, screen printing is a versatile and cost-effective technique for printing on PCBs. However, it has some limitations, including limited resolution, thickness, design flexibility, and material compatibility.
Comments are closed