PCB design can seem like a daunting task for beginners, but with the right guidance and resources, it can be a rewarding and enjoyable experience. PCBs, or printed circuit boards, are used to connect electronic components and create functional devices. From simple LED circuits to complex microcontroller-based projects, PCB design is an essential skill for anyone interested in electronics.
To get started with PCB design, it’s important to have a basic understanding of electronics and circuit theory. This includes knowledge of components such as resistors, capacitors, and transistors, as well as how to read schematics and circuit diagrams. Once you have a solid foundation in these areas, you can begin to learn the software and tools used for PCB design, such as Eagle, KiCad, and Altium Designer. With practice and patience, you can create your own custom PCBs and bring your electronic projects to life.
Basics of PCB Design
What is a PCB?
A Printed Circuit Board (PCB) is a board made of insulating material with conductive pathways etched onto its surface. PCBs are used to connect electronic components by providing a physical and electrical platform for them to be mounted on. The components are then soldered onto the board, forming a complete circuit.
Why is PCB Design Important?
PCB Design is critical because it determines the functionality and reliability of electronic devices. A well-designed PCB ensures that the components are correctly connected and positioned, minimizing the risk of errors or malfunctions. It also helps to reduce the size and weight of electronic devices, making them more compact and portable.
PCB Design Process
The PCB Design process involves several steps, including schematic design, component placement, routing, and fabrication. During schematic design, the circuit is drawn out, and the components are placed on the board. The next step is component placement, where the components are arranged in a way that optimizes the circuit’s performance. After component placement, the routing process begins, where the electrical connections between the components are established. Finally, the PCB is fabricated, and the circuit is tested to ensure that it works as intended.
In conclusion, understanding the basics of PCB design is essential for anyone interested in electronics. It is a complex process, but by following best practices and guidelines, anyone can create a functional and reliable PCB.
Designing a PCB
Designing a printed circuit board (PCB) can seem daunting to beginners, but with the right tools and knowledge, it can be a fun and rewarding experience. In this section, we will cover the basic steps to design a PCB, including choosing components, schematic design, PCB layout, and routing.
Choosing Components
The first step in designing a PCB is to choose the components you will need for your circuit. You should consider the functionality, size, and cost of each component. It is important to choose components that are readily available and easy to source.
Schematic Design
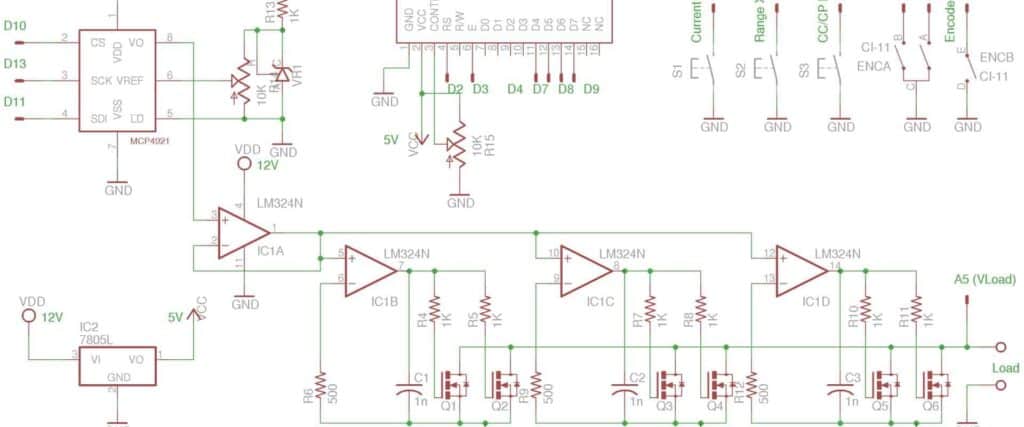
Once you have chosen your components, you will need to create a schematic diagram of your circuit. A schematic is a graphical representation of your circuit that shows how the components are connected together. There are many software tools available for creating schematics, such as Eagle, KiCAD, and Altium Designer.
PCB Layout
After you have created your schematic, you can begin to design the layout of your PCB. The layout is the physical arrangement of the components on the board. You should consider the size of the board, the placement of the components, and the routing of the traces.
Routing
The final step in designing a PCB is to route the traces. Traces are the copper pathways that connect the components on the board. You should consider the width and spacing of the traces, as well as the number of layers you will need for your board.
In conclusion, designing a PCB can be a challenging but rewarding experience. By following the basic steps outlined in this section, you can create a functional and reliable circuit board.
PCB Design Software
When it comes to designing a printed circuit board (PCB), the software used can make all the difference. There are a variety of options available, each with their own strengths and weaknesses. In this section, we’ll take a look at some of the most popular PCB design software options and compare them.

Popular PCB Design Software
Eagle PCB Design Software
Eagle PCB Design Software is a popular choice among both beginners and professionals. It offers a range of features, including schematic capture, board layout, and autorouting. Eagle also has a large online community, which can be helpful for finding resources and troubleshooting.
KiCAD
KiCAD is a free, open-source PCB design software that has gained popularity in recent years. It offers a range of features, including schematic capture, board layout, and 3D visualization. KiCAD also has a large online community, which can be helpful for finding resources and troubleshooting.
Altium Designer
Altium Designer is a professional-level PCB design software that offers a range of advanced features, including schematic capture, board layout, and autorouting. It also includes tools for signal analysis and simulation. Altium Designer is known for its high price point, but it may be worth the investment for those who need its advanced features.
Comparing PCB Design Software
When comparing PCB design software, there are a few key factors to consider:
- Price: Some software options are free or low-cost, while others can be quite expensive.
- Features: Different software options offer different features, so it’s important to consider what you need for your specific project.
- Ease of use: Some software options may have a steeper learning curve than others, so it’s important to consider how much time you’re willing to invest in learning the software.
Ultimately, the best PCB design software for you will depend on your specific needs and preferences. It may be helpful to try out a few different options before committing to one.
PCB Manufacturing
Preparing for Manufacturing
Before sending your design to be manufactured, it is important to ensure that it is ready for production. This involves checking for design errors, such as overlapping or disconnected traces, and making sure that all components are placed correctly. It is also important to generate Gerber files, which are used by PCB manufacturers to create the physical board.
PCB Fabrication
Once you have prepared your design, it is time to send it off for fabrication. There are many PCB manufacturers to choose from, and it is important to select one that meets your specific needs. Some factors to consider when selecting a manufacturer include cost, turnaround time, and quality of the finished product.
During fabrication, the Gerber files are used to create the physical board. This involves etching the copper layers, drilling holes for components, and applying a solder mask and silk screen. The finished board is then inspected for defects before being shipped to the customer.
Assembly
After receiving the finished board, it is time to assemble the components. This involves soldering the components onto the board, either by hand or using a reflow oven. It is important to follow the manufacturer’s specifications for component placement and soldering to ensure that the board functions correctly.
Testing
Once the board has been assembled, it is important to test it to ensure that it works as intended. This involves using a multimeter or oscilloscope to check for proper voltage levels and signal integrity. If any issues are found, they should be addressed and the board should be retested before being put into use.
In summary, PCB manufacturing involves preparing the design for production, selecting a manufacturer, fabricating the board, assembling the components, and testing the finished product. By following these steps, you can create a high-quality PCB that meets your specific needs.
Tips for Beginner PCB Designers
Design for Manufacturability
When designing your PCB, it’s important to keep in mind the manufacturing process. Consider the capabilities of the manufacturer and design your board to be easily manufacturable. This means avoiding designs that require complicated processes or specialized equipment.

Keep it Simple
Simplicity is key when it comes to PCB design. Avoid overcomplicating your board with unnecessary features or components. The more complex your design, the more difficult it will be to troubleshoot and manufacture.
Double Check Everything
Before sending your design to be manufactured, double check every aspect of your board. This includes checking for errors in your schematic, ensuring proper component placement, and verifying that your board meets the manufacturer’s design specifications.
Get Feedback
Don’t be afraid to seek feedback from other PCB designers or professionals in the field. This can help you identify potential issues with your design and improve upon it.
Learn from Mistakes
Mistakes are inevitable when it comes to PCB design. Instead of getting discouraged, use your mistakes as an opportunity to learn and improve. Take note of what went wrong and how you can avoid similar mistakes in the future.
By following these tips, beginner PCB designers can create designs that are manufacturable, simple, and error-free. Remember to always double check your work, seek feedback, and learn from your mistakes to continually improve your skills.
| Tips for Beginner PCB Designers |
|---|
| Design for Manufacturability |
| Keep it Simple |
| Double Check Everything |
| Get Feedback |
| Learn from Mistakes |
Comments are closed